Manual.ly Logo

Grundig Sonoclock 3500 BT DAB+ Mode-D-Emploi

3,4 · 5 Notes

Manuel PDF · 3 Pages

Français

M: GO-GEM-FL-25
page

/ 3

Loading...
4821ce1e1c3ece5d8983aa84d2bd88fe657d page 1
These additives can corrode the
device supports, leaving resi-
dues on the furniture surfaces
which can be difficult or impos-
sible to remove.
▪
Only use the device in a moder-
ate climate.
▪
Do not use any cleaning agent,
as this may damage the casing.
Clean the device with a clean,
moist leather cloth.
▪
Do not expose the back-up bat-
tery to extreme heat, caused for
example by direct sunlight, heat-
ers or fire.
▪
Never open the device casing.
No warranty claims are ac-
cepted for damage caused by
incorrect handling.
Compliance with RoHS Directive
The product you have purchased complies with EU
RoHS Directive (2011/65/EU). It does not contain
harmful and prohibited materials specified in the Di-
rective.
Package information
Packaging materials of the product are
manufactured from recyclable materials in
accordance with our National Environ-
ment Regulations. Do not dispose of the
packaging materials together with the domestic or
other wastes. Take them to the packaging material
collection points designated by the local authorities.
This device is noise-suppressed according to the
applicable EU directives. This product fulfils the
European directives 2014/53/EU, 2009/125/EC
and 2011/65/EU. You can find the CE declaration
of conformity for the device in the form of a pdf file
on the Grundig Homepage
www.grundig.com/downloads/doc
Power supply:
Manufacturer of AC Adaptor: Dongguan Turnmax
Electronic Co., Ltd.
Adress: Erxiafang Industrial Zone, Xiansha, Gabou
Town, Dongguan, Guangdong Province 523287,
P.R. China
Model: TM-K007VC-00501500PE-02
AC Adaptor Input:100 - 240V
~
, 50/60 Hz 0.25A;
Output: 5V 1.5A 7.5W
Average active efficiency: 76,65%
No-load power consumption: <0.1W
Max. Power consumption:
<11 W (operation)
<1W (standby)
Output:
USB host: 5V 1A charge out
Back up micro batteries:
Back up DC Batt: 2 x 1.5v UM4/R03/AAA
Frequency bands:
DAB/DAB+ 174.928 – 239.200 MHz
BT Frequency: 2402 - 2480 MHz
BT maximum transmitted power: 4dBm
FM 87.5 ...108.0 MHz
Circuit features:
Loudspeaker: 3 inch
Output Power: 2 W
Dimensions:
W x H x L 200 x 120 x 65 cm
Weight: 450 gr
Technical and design modifications reserved.
POWER SUPPLY
Mains operation
Check that the mains voltage on the type plate (on
the bottom of the device) corresponds to your local
mains supply. If this is not the case, contact your spe-
cialist dealer.
1 Plug the power adaptor into the socket
(100 - 240V
~
, 50/60 Hz).
Caution:
▪
The device is connected to the mains with the
power plug. To fully disconnect the device from
the mains, pull out the plug.
▪
The mains plug is used to disconnect the device. It
shall remain readily operable and should not be
obstructed during intended use.
Inserting the back-up battery
The back-up batteries ensure that the stored set¬tings
are not lost in the case of a power failure.
1 Open the battery compartment by pressing the
area market and pushing down the cover.
2 Observe the polarity marked on the base of the
battery compartment when inserting the batteries
(micro batteries, 2 x 1.5 V, R03/ UM 4/ AAA).
3 Close the battery compartment.
Note:
▪
Remove the back-up battery when it is flat or when
you know that the device will not be used for a
long period of time.
Environmental note:
▪
Batteries, including those which do not contain
heavy metal, should not be disposed of with
household waste. Always dispose of used batter-
ies in accordance with local environmental regu-
lations.
DAB MODE
Antenna
For the best DAB and FM (UHF) reception it is suf-
ficient to align the wire antenna accordingly.
Switching “ON/OFF”
1 Switching the device from standby with
»ON/OFF« button;
2 Switch the device to standby with »ON/OFF«
button
Searching for and saving radio sta-
tions - automatically
The radio will perform ATS when you use the radio
for the first time. The radio will search for the DAB
stations and store into the DAB radio list. And then, it
will search for FM stations and store into FM presets.
Selecting a DAB station
1 Press and release the »ON/OFF« button to
switch on your radio.
2 Press the »MODE/MENU« button until the DAB
mode is selected.
3 Press the »TUNING +« or »TUNING -« button
to choose the DAB station from the list.
4 When the desired station name ap-
pears on the display, press the
»SNOOZE/SLEEP/INFO/SELECT« button to
select the station. The radio will select the new
station.
Display DAB information
Manual tuning allows you to tune your radio to a
particular DAB frequency in Band III.
1 Press and hold the »MODE/MENU« button for 2
seconds, the display will show DAB menu.
2 Press the »TUNING +« or »TUNING -« button
until ‘MANUAL’ shows on the display.
3 Press the »SNOOZE/SLEEP/INFO/SELECT«
button to enter manual tuning mode.
4 Press the »TUNING +« or »TUNING -« but-
ton to select the desired DAB channel. press the
»SNOOZE/SLEEP/INFO/SELECT« button to
tune to the chosen frequency.
5 If a signal is present, this will be indicated on a
signal strength display. The minimum signal mark-
er (|) shows the minimum signal strength needed
for good DAB reception.
6 Press the »SNOOZE/SLEEP/INFO/SELECT«
button to store the new DAB stations into the list
and return to normal tuning.
Display DAB information
Your radio has a range of display op-
tions when in DAB mode, press the
»SNOOZE/SLEEP/INFO/SELECT« button
to cycle through the various displays, including:
Station name, DLS, Program type, Multiplex name,
Frequency, Bit rate, Signal strength, time and data.
All display options except the text display will revert
to the clock display after 10 seconds.
Dynamic Range Control (DRC)
The Prune stations function will delete the marked
DAB stations from your station list.
1 Press the »ON/OFF« button to switch on your
radio and press the »MODE/MENU« button to
switch until DAB mode.
2 Press and hold the »MODE/MENU« button for 2
seconds, the display will show DAB menu.
3 Press the »TUNING +« or »TUNING -« button
until ‘PRUNE’ shows on the display.
4 Press the »SNOOZE/SLEEP/INFO/SELECT«
button, then ‘SELECT’ will be shown on the dis-
play.
5 Press the »SNOOZE/SLEEP/INFO/SELECT«
button to cause the invalid station names to be
removed from the station list. The display will re-
turn to station name display after several seconds.
FM MODE
Automatically and manually tuning for FM radio sta-
tions
You can store 10 radio stations on presets.
The DRC facility can make quieter sounds easier to
hear when your radio is used in a noisy environment.
1 Press the »ON/OFF« button to switch on your
radio.
2 Press and hold the »MODE/MENU« button for 2
seconds, the display will show DAB menu.
3 Press the »TUNING +« or »TUNING -« button
until ‘DRC’ shows on the display.
4 Press the »SNOOZE/SLEEP/INFO/SELECT«
button to enter adjustment mode.
5 Press the »TUNING +« or »TUNING -« button
to select required DRC setting, DRC 0, DRC 1 or
DRC ½;
6 Press and release the
»SNOOZE/SLEEP/INFO/SELECT« button to
confirm the setting. The display will return to the
station name display after several seconds.
Prune stations - DAB
If you move to a different part of the country, some of
the stations which were listed may no longer be avail-
able. Stations which cannot be found, or which have
not been received for a very long time are shown in
the station list with a question mark.
SETUP AND SAFETY EN
▪
This device is designed for the
playback of audio signals. Any
other use is expressly prohibited.
▪
Protect the device from moisture
(water drops or splashes). Do
not place any vessels such as
vases on the device. These may
be knocked over and spill fluid
on the electrical components,
thus presenting a safety risk.
▪
Do not place any naked flames
such as candles on the device.
▪
Thunderstorms are a danger to
all electrical devices. Even if the
device is switched off, it can be
damaged by a lightning strike to
the mains cable.
1 Activate the auto FM station tuning by press-
ing and holding the »TUNING +« or
»TUNING -« buttons until the frequen-
cy display changes to rapid run-through.
The search stops when a station is found.
Note:
▪
To move the frequency forward in steps, briefly
press »TUNING +« or »TUNING -« several
times.
2 Or to start FM manual tuning by briefly pressing
the »TUNING +« or »TUNING -« buttons, the
radio will step up or down for 50kHz by each
pressed.
Display FM information
Your radio has a range of display op-
tions when in FM display mode, press the
»SNOOZE/SLEEP/INFO/SELECT« button to cy-
cle through the various displays, including: Station
name, Radio text, PTY, Frequency, time and data. All
display options except the text display will revert to
the clock display after 10 seconds.
FM scanning settings
Your radio includes a local FM for strong FM sta-
tions, and distant option for all the strong and weak
▪
The type plate is located on the
bottom of the device.
▪
Do not expose the device to ex-
treme heat, caused for example
by direct sunlight, heater fire.
Compliance with the WEEE Directive
and Disposing of the Waste Product:
This product complies with EU WEEE Directive
(2012/19/EU). This product bears a classification
symbol for waste electrical and electronic equipment
(WEEE).
This symbol indicates that this product
shall not be disposed with other house-
hold wastes at the end of its service life.
Used device must be returned to offical
collection point for recycling of electrical
and electronic devices. To find these collection sys-
tems please contact to your local authorities or re-
tailer where the product was puchased. Each house-
hold performs important role in recovering and
recycling of old appliance. Appropriate disposal of
used appliance helps prevent potential negative con-
sequences for the environment and human health.
Always disconnect the mains
cable during a storm.
▪
If malfunctions occur due to
static electricity charges or brief
mains voltage surges, reset the
device. To do this, pull out the
mains adapter and connect it
again after a few seconds.
▪
Make sure the device is ade-
quately ventilated. Do not cover
the ventilation slots with newspa-
pers, table cloths, curtains, etc.
▪
When deciding where to place
the device, please note that furni-
ture surfaces are covered by var-
ious types of varnish and plastic,
most of which contain chemical
additives.
FM stations.
1 Press the »ON/OFF« button to switch on the radio
to FM mode.
2 Press and hold the »MODE/MENU« button, the
display will show Setting.
3 Press the »SNOOZE/SLEEP/INFO/SELECT«
button to enter Setting.
4 Press the »TUNING +« or »TUNING -« button
to select Local FM or Distant;
5 Press the »SNOOZE/SLEEP/INFO/SELECT«
button to confirm the setting.
Searching for and saving radio sta-
tions for DAB or FM
You can store 10 radio stations on presets for each of
the DAB mode or FM mode.
1 Switch on the radio to DAB or FM mode.
2 Select the desired DAB station from the list,
or search the desired FM station by pressing
»TUNING +« or »TUNING -« buttons.
3 Press and hold the »PRESET« button to activate
the memory function.
4 Press »TUNING +« or »TUNING -« buttons to
select the preset.
5 Press the »SNOOZE/SLEEP/INFO/SELECT«
button to save the station.
Note:
▪
If the stations are already stored on the presets,
they are overwritten when new stations are stored.
6 To store more stations, repeat the steps 1 to 4.
Selecting stored stations
7 Select the preset by pressing the »PRESET« but-
ton to select the preset stations one after another.
Adjusting the volume
8 Adjust the volume with »VOLUME -/AL1« or
»VOLUME +/AL2« buttons.
BLUETOOTH MODE
Connect to mobile device with Blue-
tooth
1 Switching the device from standby with
»ON/OFF« button.
2 Press the »MODE/TIME« button repeatedly until
»bt« is shown on display;
3 The Bluetooth icon will be flashing on LCD;
4 Go to your mobile device, and find the “Sonoclock
3500” from the available Bluetooth device list.
Then press to connect to the radio.
5 When Sonoclock 3500 BT DAB+ has been con-
nected to the mobile device, the Bluetooth icon
will be stopped flashing.
Playback control via Bluetooth
1 Press the »ON/OFF« button to switch on the ra-
dio.
2 Connect the Sonoclock 3500 BT DAB+ to mobile
device via Bluetooth.
3 Press the »PRESET« button to toggle the music
playback in between play or pause status.
4 Press the »TUNING-« button to skip back to pre-
vious played songs.
5 Press the »TUNING+« button to skip to the next
songs.
Pairing mode
1 Press the »ON/OFF« button to switch on the ra-
dio;
2 If the Sonoclock 3500 BT DAB+ is connecting to
any mobile device via Bluetooth, press and hold
the »PRESET« button to disconnect the current
Bluetooth connection.
3 The Sonoclock 3500 BT DAB+ will be in Bluetooth
pairing mode with flashing the Bluetooth icon.
4 You can repeat the steps in “Connect to mobile
device with Bluetooth” for a new Bluetooth con-
nection.
Adjusting the volume
1 Adjust the volume with »VOLUME -/AL 1« or
»VOLUME +/AL 2« buttons.
Power saving in Bluetooth
If there is no Bluetooth connection from the radio to
any mobile devices, the Sonoclock 3500 BT DAB+
will switch to standby mode after 15 minutes.
TIMER MODE
Synchronise the time from either DAB
or FM
1 Switch the device from standby with
»ON/OFF« button, then press and hold the
»MODE/MENU« button for two seconds to acti-
vate the menu setting.
2 Press the »TUNING +« or
»TUNING -« button find ‘SYSTEM’, then press
the »SNOOZE/SLEEP/INFO/SELECT« button
to enter system menu;
3 Press the »TUNING +« or
»TUNING -« button find ‘TIME’, then press the
»SNOOZE/SLEEP/INFO/SELECT« button to
enter;
4 Press the »TUNING +« or
»TUNING -« button find ‘UDPATE’, then press
the »SNOOZE/SLEEP/INFO/SELECT« button
to enter;
5 Now you can use the »TUNING +« or
»TUNING -« button choose the time source from
‘ANY’, ‘DAB’, ‘FM’ or ‘NONE’, then press the
»SNOOZE/SLEEP/INFO/SELECT« button to
enter system menu;
Manual set time
1 You can enter the time manually by following the
step 1 to 3 from the ‘Synchronise the time from
either DAB or FM’.
2 Select ‘SET TIME’, then press the
»SNOOZE/SLEEP/INFO/SELECT« button to
enter manual set time.
3 Please use the »TUNING +« or »TUNING -«
button to select the desired time and date, and
use the »SNOOZE/SLEEP/INFO/SELECT«
button to confirm the settings.
Set time display format
1 You can enter the time display format by following
the step 1 to 3 from the ‘Synchronise the time from
either DAB or FM’.
2 Select ‘SET FORMAT, then press the
»SNOOZE/SLEEP/INFO/SELECT« button to
enter set time display format.
3 Please use the »TUNING +« or
»TUNING -«button to select the ‘12’ or ‘24’, and
use the »SNOOZE/SLEEP/INFO/SELECT«
button to confirm the settings.
Setting the alarm time
1 Switch the device to standby with »ON/OFF« but-
ton;
2 Press and hold the »VOLUME -/AL 1« button
for alarm 1 or »VOLUME +/AL 2« for alarm 2;
3 For example, press and hold
»VOLUME -/AL 1« button to en-
ter alarm 1 setting menu, then press the
»SNOOZE/SLEEP/INFO/SELECT« button to
start alarm 1 setup.
4 Please choose »ON« to activate the alarm, or
»OFF« to deactivate the alarm, then press the
»SNOOZE/SLEEP/INFO/SELECT« button to
next.
5 Please use the »TUNING +« or
»TUNING -« button to select the alarm time, and
use the »SNOOZE/SLEEP/INFO/SELECT«
button to next step.
6 Please use the »TUNING +« or
»TUNING -« button to choose from ‘WEEKDAYS’,
‘WEEKENDS’, ‘DAILY’ or ‘ONCE’, and then use
the »SNOOZE/SLEEP/INFO/SELECT« button
to the next settings.
Note:
▪
If you choose ‘ONCE’ alarm, you must set the spe-
cific date for the alarm.
7 Please use the »TUNING +« or
»TUNING -« button to select the desired alarm
from ‘DAB’, ‘FM’ or ‘BUZZER’, then press the
»SNOOZE/SLEEP/INFO/SELECT« button to
confirm the settings.
Note:
▪
If you have chosen either ‘DAB’ or ‘FM’ as the
alarm source, you must choose the preset station
or the last listened station of the mode.
8 Please use the »TUNING +« or »TUNING -«
button to select the desired alarm volume, then
press the »SNOOZE/SLEEP/INFO/SELECT«
button to confirm the settings. The display will be
showing ‘SAVED’ to exit the alarm setup.
Notes:
▪
The device wakes you up at the set alarm time, the
alarm duration is 60 minutes.
▪
After activating the alarm, the corresponding
alarm icon will be lightened.
Snooze the alarm
1 Press the »SNOOZE/SLEEP/INFO/SELECT«
while the alarm is sounding.
2 During snooze, the SNOOZE LED will be light-
ened.
Note:
▪
The alarm signal will be stopped, and the alarm
will be sounded again after nine minutes.
Cancelling the alarm
1 Press »ON/OFF« while the alarm is sounding.
Note:
▪
The alarm will be sounded again at the next set
alarm time.
Activating and deactivating the alarm
1 In standby mode, press »VOLUME -/AL 1« or
»VOLUME +/AL 2« button to activate the alarm
with last used alarm settings or to deactivate the
alarm.
Sleep timer
1 Press and hold the
»SLEEP/SNOOZE/INFO/SELECT« button for
about 2 seconds to activate the sleep timer.
2 Then repeatedly press the »TUNING +« or
»TUNING -« button to select the auto switch-off
timer from 90 minutes to 10 minutes, then press
the »SNOOZE/SLEEP/INFO/SELECT« button
to confirm.
3 To switch off the sleep timer before the set time
press and hold
»SNOOZE/SLEEP/INFO/SELECT« button
for about 2 seconds, then repeatedly press
»TUNING +« or »TUNING -« button until
»OFF« is displayed, then press the
»SNOOZE/SLEEP/INFO/SELECT« button to
confirm.
Brightness settings
1 Switch the device from standby with »ON/
OFF« button, then press and hold the »MODE/
MENU« button for two seconds to activate the
menu setting.
2 Press the »TUNING +« or
»TUNING -« button find ‘SYSTEM’, then press
the »SNOOZE/SLEEP/INFO/SELECT« button
to enter system menu;
3 Press the »TUNING +« or
»TUNING -« button find ‘DIMMER’, then press
the »SNOOZE/SLEEP/INFO/SELECT« button
to enter;
4 If you wish to setup the brightness level of radio
modes, please choose ‘NORMAL’; if you wish
to setup the brightness level of standby mode,
please choose ‘STANDBY’.
5 Press the »TUNING +« or
»TUNING -« button find ‘desired brightness lev-
el from ‘HIGH’, ‘MID’ or ‘LOW’, then press the
»SNOOZE/SLEEP/INFO/SELECT« button to
confirm;
Language settings
Factory reset
1 Switch the device from standby with
»ON/OFF« button, then press and hold the
»MODE/MENU« button for two seconds to acti-
vate the menu setting.
2 Press the »TUNING +« or
»TUNING -« button find ‘SYSTEM’, then press
the »SNOOZE/SLEEP/INFO/SELECT« button
to enter system menu;
3 Press the »TUNING +« or
»TUNING -« button find ‘FACTORY’, then press
the »SNOOZE/SLEEP/INFO/SELECT« button
to enter;
4 If you wish to reset all the set-
tings to factory default, press the
»SNOOZE/SLEEP/INFO/SELECT« button to
confirm;
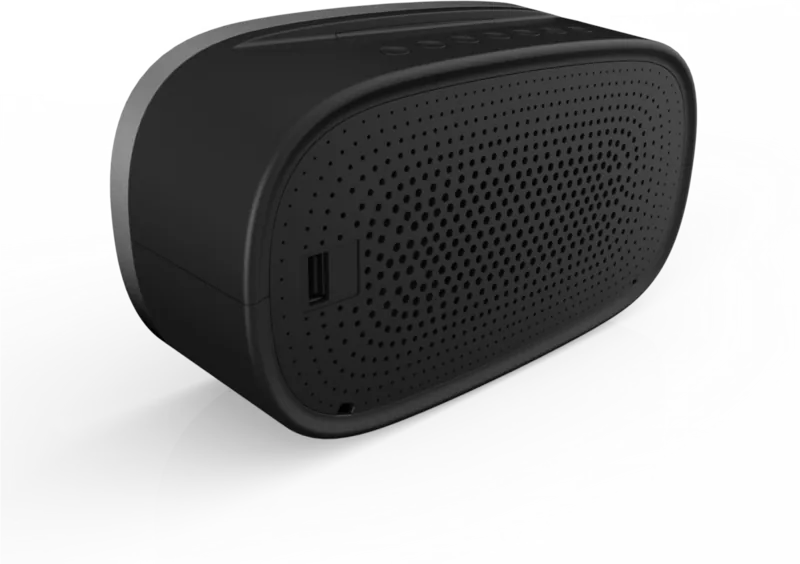
Charging a mobile phone
The USB socket on the back side can provide DC
power of 5V for charging a mobile phone. Connect
the mobile phone to the USB socket with an appro-
priate cable. The USB power is available in all the
operating modes and including standby mode. Refer
to the user manual or the manufacturer of the mobile
phone to verify if it supports charging from an USB
power. The USB socket is suitable for DC power-out
only and cannot be used for e.g. playback of music
from a USB stick.
TUNING+ VOL+/AL 2
VOL-/AL 1
TUNING-
ON/OFF
USB
SLEEP
SNOOZE
INFO/SELECT
PRESET
PLAY/PAUSE MODE/MENU
Sonoclock 3500
EN - DE - FR
User Manual
Clock Radio
01M-GCR1120-4620-03

Discutez avec votre manuel Grundig Sonoclock 3500 BT DAB+ grâce à l'IA

Obtenez des réponses instantanées par IA à partir de votre manuel Grundig Sonoclock 3500 BT DAB+

Posez toutes vos questions concernant le Grundig Sonoclock 3500 BT DAB+. Les réponses proviennent de ce manuel, avec les pages dont elles sont tirées.

Sonoclock 3500 BT DAB+ Programme d'entretien

Au besoin
Nettoyer le boîtier de l'appareil

Utiliser un chiffon en cuir propre et humide. N'utilisez pas d'agents de nettoyage car ils pourraient endommager le boîtier.

Lorsque la batterie est plate ou pour un stockage à long ter
Retirer les piles de sauvegarde

Retirez la pile de sauvegarde lorsqu'elle est plate ou si l'appareil ne sera pas utilisé pendant une longue période.

M: QW-35-FL

Poser une Question

0/1000

Recommandez-vous Sonoclock 3500 BT DAB+?

Oui Non
0
User Pic

Sven Krueger

il y a 8 mois

J'ai du mal a comprendre les boutons et le manuel. Comment puis-je regler correctement l'heure de reveil sur le Sonoclock 3500, et y a-t-il un moyen de reinitialiser si je suis bloque ?

0
User Pic

Manual.ly

il y a 8 mois

La clé est de d'abord régler le bon mode, puis de programmer l'alarme. Commencez par régler l'heure actuelle en mode Horloge/Heure. Ensuite, sélectionnez l'alarme (AL1 ou AL2) et accédez aux réglages de l'alarme (généralement en appuyant longuement sur le bouton AL1/AL2). Utilisez les commandes des heures et des minutes pour ajuster l'heure de réveil, puis confirmez par une brève pression sur le même bouton AL1/AL2. Si vous souhaitez un réveil par radio, changez la source de réveil sur Radio dans la configuration de l'alarme (l'écran devrait afficher l'alarme et la source). Si les réglages ne sont pas sauvegardés ou si vous perdez vos repères, effectuez une réinitialisation (utilisez le bouton Reset si disponible, ou débranchez pendant environ 10 secondes et rebranchez). Après la réinitialisation, réglez d'abord l'heure, puis l'alarme à nouveau.

M: OA-GPT-5-NAN
M: OA-GPT-5-NAN

Foire aux Questions

A

Il prend en charge la radio DAB/DAB+ et FM, vous pouvez donc écouter des stations numériques ou des émissions analogiques classiques. Il inclut aussi le Bluetooth pour l'audio sans fil depuis un téléphone ou un autre appareil mobile.

Cette réponse est-elle utile?

A

Oui. Appairez votre téléphone ou votre tablette avec le Sonoclock 3500 BT DAB+ et diffusez l'audio sans fil. Vous pouvez contrôler la lecture avec les boutons de la radio pour la lecture/pause et le changement de piste.

Cette réponse est-elle utile?

A

Oui. Il propose deux réglages d'alarme, ainsi que des options de réveil par radio ou par buzzer. Vous pouvez aussi choisir une programmation quotidienne, en semaine, le week-end ou une alarme unique.

Cette réponse est-elle utile?

A

Oui. La minuterie de sommeil peut éteindre automatiquement la radio après un intervalle choisi, ce qui est utile pour s'endormir avec de la musique ou la radio sans la laisser allumée toute la nuit.

Cette réponse est-elle utile?

A

Oui. Le compartiment pour piles de secours est conçu pour préserver les réglages enregistrés en cas de panne de courant, afin de protéger vos alarmes et les réglages de l'horloge.

Cette réponse est-elle utile?

A

Non. Le port USB sert uniquement à charger des appareils mobiles. Il fournit une sortie d'alimentation, mais n'est pas destiné à la lecture musicale depuis un support USB.

Cette réponse est-elle utile?

M: GO-GEM-FL-25

Avantages et Inconvénients

Avantages

  • DAB+, FM et Bluetooth dans un seul appareil de chevet compact.
  • Deux alarmes, la fonction snooze et la minuterie de sommeil s'adaptent aux routines quotidiennes.
  • La mémoire des présélections accélère l'accès aux stations préférées.
  • La charge USB et les piles de secours ajoutent une valeur pratique.
VS

Inconvénients

  • Le petit haut-parleur de 3 pouces et la puissance de 2 W conviennent surtout à une écoute personnelle.
  • Le port USB sert uniquement à charger des appareils ; il ne lit pas la musique depuis une clé USB.
  • Le système de menus peut sembler complexe au début.
  • La disposition de l'écran et des boutons peut demander du temps pour être totalement maîtrisée.
M: GO-GEM-FL-25

Produit Spécification

Puissance

2 W RMS

Tuner

FM, DAB+

Affichage

LED, Heure

Connexions supplémentaires

USB-A

Alimentation

Fonctionnement sur secteur

Fonctionnalités spéciales

Radio-réveil, Fonction de chargement (USB)

Couleur

noir

Dimensions

200 x 120 x 50 mm (L x H x P)

M: GO-GEM-FL-25

Description du Produit

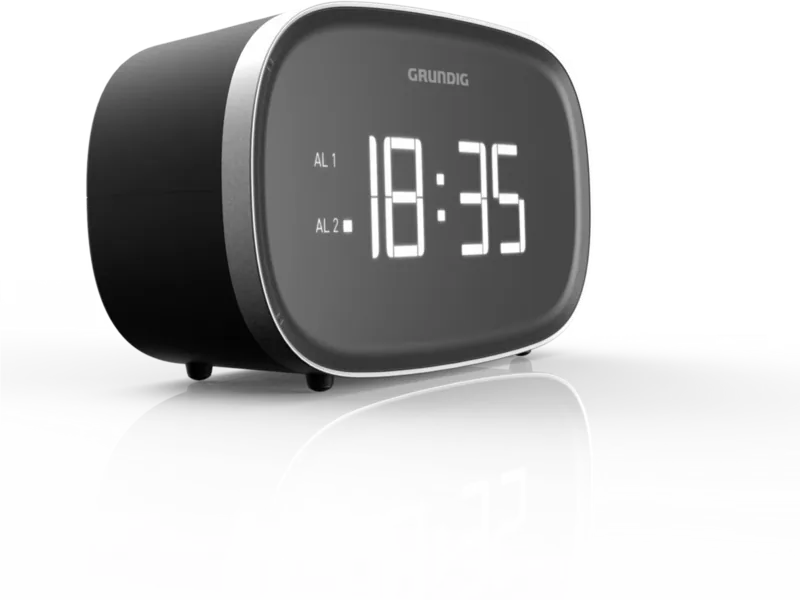
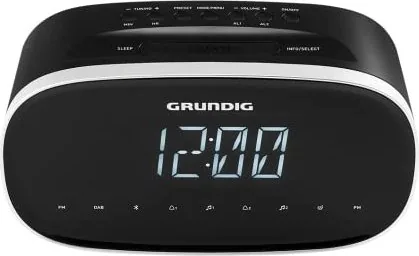
Manuel du Grundig Sonoclock 3500 BT DAB+ : un radio-réveil compact avec une flexibilité moderne

Le Grundig Sonoclock 3500 BT DAB+ est un compagnon de chevet pratique conçu pour ceux qui veulent plus qu'un simple réveil. Il combine la radio DAB/DAB+, la radio FM et la lecture Bluetooth dans un seul appareil compact, ce qui permet de passer facilement des informations du matin aux playlists en streaming sans changer d'appareil. Pour quiconque recherche le manuel du Grundig Sonoclock 3500 BT DAB+, le message clé est clair : ce modèle est conçu pour la praticité, la fiabilité au quotidien et une commande simple.

À la base, le Sonoclock 3500 BT DAB+ met l'accent sur la qualité d'écoute et la simplicité d'utilisation. La radio prend en charge la recherche automatique des stations, le réglage manuel et la mémorisation des présélections, afin d'accéder rapidement aux chaînes préférées. Le mode DAB donne accès aux stations numériques avec des informations supplémentaires à l'écran, tandis que le mode FM reste disponible pour les émissions traditionnelles. Bluetooth ajoute une autre dimension de polyvalence, en vous permettant de connecter un téléphone et d'utiliser la radio comme une petite enceinte sans fil.

Les fonctions d'alarme sont particulièrement utiles. Vous pouvez régler deux alarmes distinctes, choisir entre un réveil par radio ou par buzzer, et ajuster la programmation pour les jours de semaine, les week-ends, une utilisation quotidienne ou une alerte unique. La fonction snooze vous offre un court délai de sommeil supplémentaire, et la minuterie de sommeil est idéale pour écouter la radio la nuit avant l'arrêt automatique de l'appareil. Les réglages de luminosité permettent aussi d'adapter l'écran à différentes conditions de pièce, d'une chambre sombre à un espace de travail plus lumineux.

Au-delà de la lecture et des alarmes, le Sonoclock 3500 BT DAB+ inclut des options bien pensées telles que la synchronisation de l'heure, le réglage manuel de l'heure et une sortie de charge USB pour un téléphone mobile. Les piles de secours aident à conserver les réglages en cas de coupure de courant, ce qui est un avantage pratique pour un radio-réveil censé fonctionner en continu. Sa taille compacte et sa légèreté permettent de le placer facilement sur une table de nuit ou une étagère sans prendre beaucoup de place.

Notes

  • Les présélections DAB et FM accélèrent l'écoute quotidienne.
  • L'appairage Bluetooth est utile pour les podcasts et le streaming musical.
  • Le port USB sert uniquement à la charge, pas à la lecture musicale.
  • Les piles de secours aident à protéger les réglages enregistrés en cas de panne.

En bref, il s'agit d'une radio de chevet polyvalente pour les utilisateurs qui apprécient la radio numérique, l'audio sans fil et la commodité d'un radio-réveil dans un seul ensemble abordable.

M: GO-GEM-FL-25

© Copyright 2026 Manual.ly